Process a Google Photo's Takeout
- 3 minsProcessing a Google Takeout of photographs and videos can be an arduous task. It’s a necessity when taking steps to reduce reliance on big tech through self-hosting. This is particularly true when moving away from Google Photos and towards having a single source of backed-up, content-based truth. Luckily, I made a bunch of mistakes on your behalf.
Many of us switched wholesale to Google Photos shortly after its launch, uploading every JPG, PNG and MP4 into the cloud. It was the peak of the tech sector’s “live in the cloud” push excitement. Managing photos is a pain, and the offering was compelling and using other people’s computers is convenient. A great gallery experience, limitless storage, and straightforward editing tools drew data towards other people’s computers.
This was great whilst it was free. . . but then it isn’t everything. It was tolerable when original quality uploads from Pixel phones were included, but that’s disappearing soon. Today, without really noticing, I’ve been paying Google a few pounds a month to keep hold of photos I rarely look at but don’t count as a freebie. It’s only a little money, but a bill that will only ever get bigger without action.
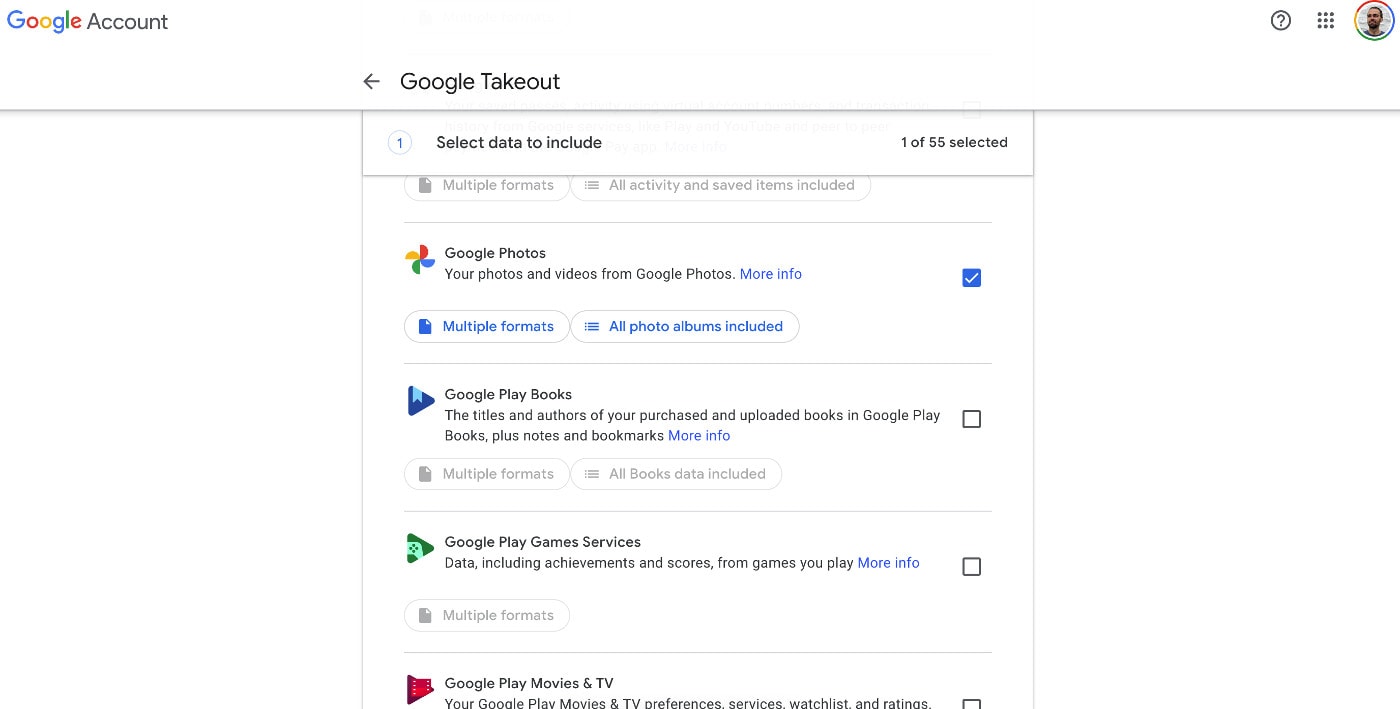
Google Takeout is the simplest way to get a copy of your personal photos and videos from Google’s servers. You can select which part of the ecosystem you’d like to download with a few clicks. Choose one area at a time, e.g. photos, if you too are knee-deep in the ecosystem.

The download will include LOTS of duplication, but this is okay. You get your original images, processed images, edited images and any albums of images as a self-contained entity. The albums are handy for sharing a copy of pictures with people who won’t have access to your library.
All in all, this turned a 50GB collection of images (which had already been trimmed down) into a 340GB download and 400GB expanded. If available working space is at a premium during the sorting of files, deselect downloading albums from the takeout interface.
Clicking accept will start the process of collating your requested files into zip folders. It’ll take up to a day to be prepped, but once ready, you can download them directly from the notification email.
Unfortunately, the drive in my laptop won’t fit all of the zip files, let alone the expanded version on top. Thankfully, the download location is changeable in Firefox, meaning the zips can be saved directly to an external drive with all files in one parent folder.

If you were to extract the zips individually, you’d end up with folders called Takeout, Takeout 2 etc. Merging these using the Mac Finder app would not result in a merge, as most would understand. Finder will replace any folders and files with ones having a later creation date, along with any files within. Not ideal. You’ll lose loads. Don’t do this.
Instead, use ditto. Ditto is a great tool for working with directories and archives from the command line. In this case, we’ll take advantage of the automatic directory merging when exporting archives. The syntax is:
ditto -x [options] Source_Archive Destination_folder.
Your command should look something like this:
ditto -x -k \
	takeout-20190710T165610Z-001.zip \
	takeout-20230714T173040Z-002.zip \
	takeout-20230714T173040Z-003.zip \
    /Volumes/WD-4TB/Photos/tony-import/google-takeout-merge 1>log.txt 2>&1
The -x option indicates that the source files are archives. The 1-k1 option shows that we’re extracting .zip format archives in particular.
If you ask ChatGPT nicely, it’ll expand the command to include the right number of archives for you. Enter that into the terminal, and a while later, you’ll have a folder of memories.
Congratulations. You now own all of your own photos again. Multiple versions of them, in fact. De-duping will be part of setting up our FOSS photo library, but we’ll save that for a future post.